
Wallet plugin In the website and application, it helps you that customers can have various payment methods. Also if you want from Add-on for introduction to friends also use it, this plugin must be used. In addition to the possibility of purchasing credit by customers, the wallet plugin allows the site admin to add credit to its users in different ways. In the following, the items are explained in detail.
Wallet activation:
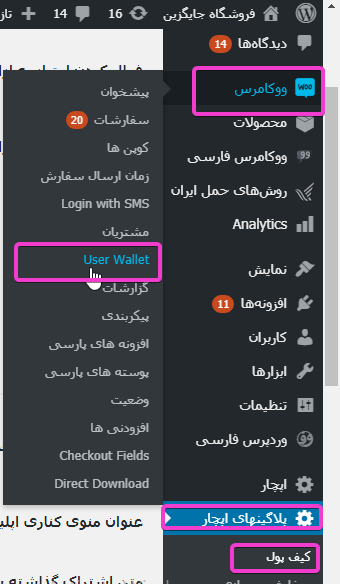
To activate the wallet, it is enough to go to Appchar website and buy the wallet first. Then copy the license created on the dashboard page and go to Appchar plugins and put the license and activate it. After activation, the user wallet option will be added to your WooCommerce section. Also, a wallet will be added to the AppChar plugins section.
Wallet plugin settings:
The wallet plugin has many settings and is divided into several parts, which are explained in detail below.
1- How to define credits
2- Allocation of credit for customers' purchases
3- Credit allocation by admin
4- Activating the wallet option for payments
1- How to define credits:
To define credit, you must refer to the products section and click on add a new product in this section.
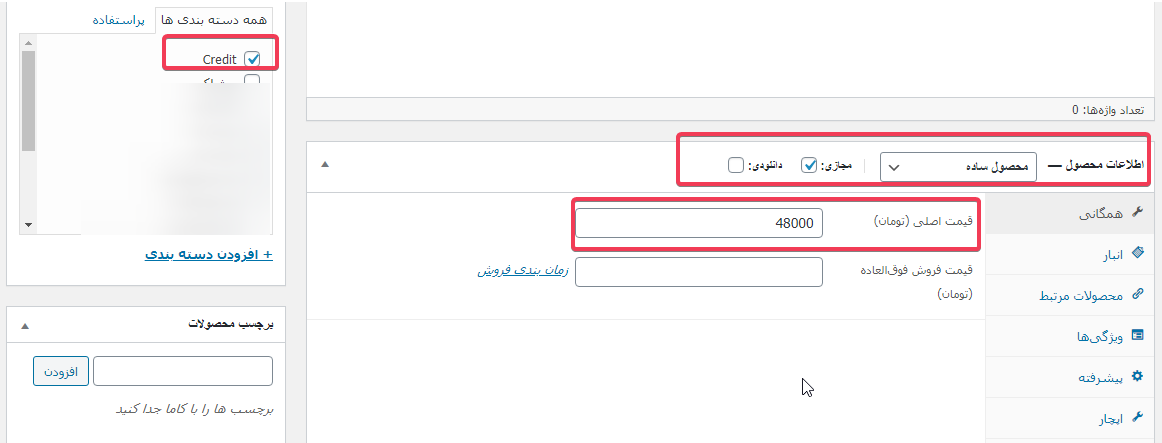
First, we determine the title. For example, we put a credit of 50,000 tomans. Then you go to the product information section and determine the simple and virtual product. Then you determine the price of this credit.
Note: The amount payable by customers can be less or more or equal to the determined credit. (In our example, the amount is defined as 48,000 Tomans).
Then, among the categories, check the credit category. (This category is created automatically)
Then click the publish button.
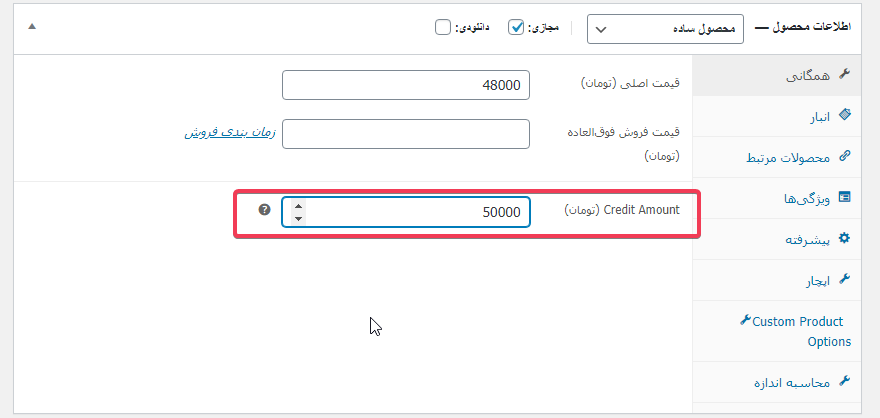
After pressing the publish button, you must go to the product information section and determine the amount of credit. If this part is not completed, no credit will be added with the purchase of credit.
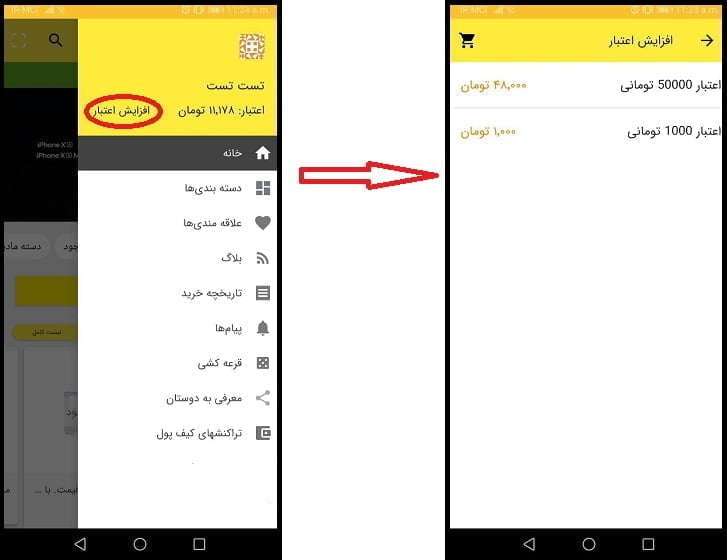
After doing this in the application, credit will be available for purchase.
2- Credit allocation for customers' purchases:
You may want to give users credit as a gift for buying from you. In the wallet extension, you can add credit to users as a percentage of the shopping cart or a specific amount after purchase.
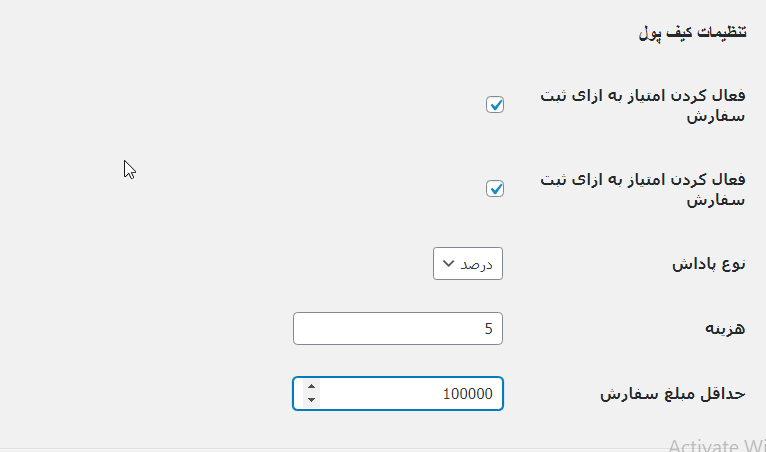
In the settings of this section, you can specify the minimum purchase amount to allocate this gift credit.
For this, it is enough to go to the Appchar plugins section, wallet, and make the settings. In the picture below, we have activated the reward in terms of percentage and for purchases over 100 thousand tomans, we give 5% of the shopping cart to the credit user. (in the percentage mode, the cost between 1 and 100 percent must be selected, and in the fixed mode, the cost of a fixed amount)
3- Credit allocation by admin:
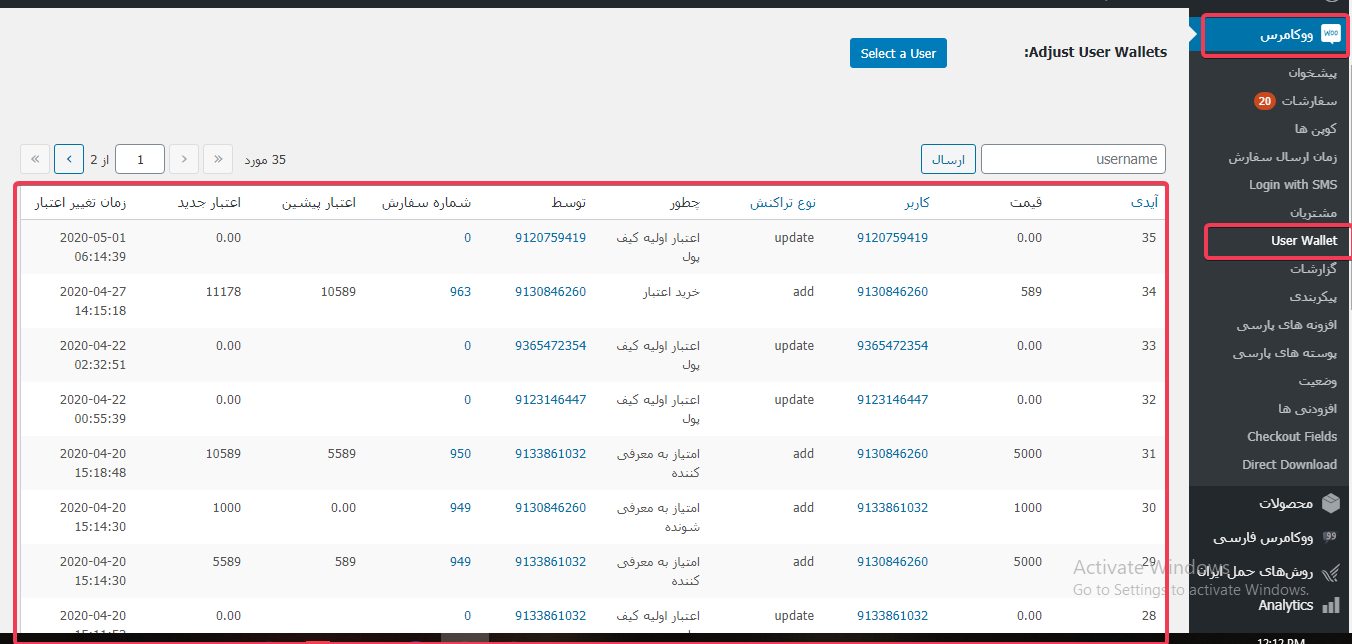
For this, it is enough to refer to the WooCommerce user wallet section. and click the select user option.
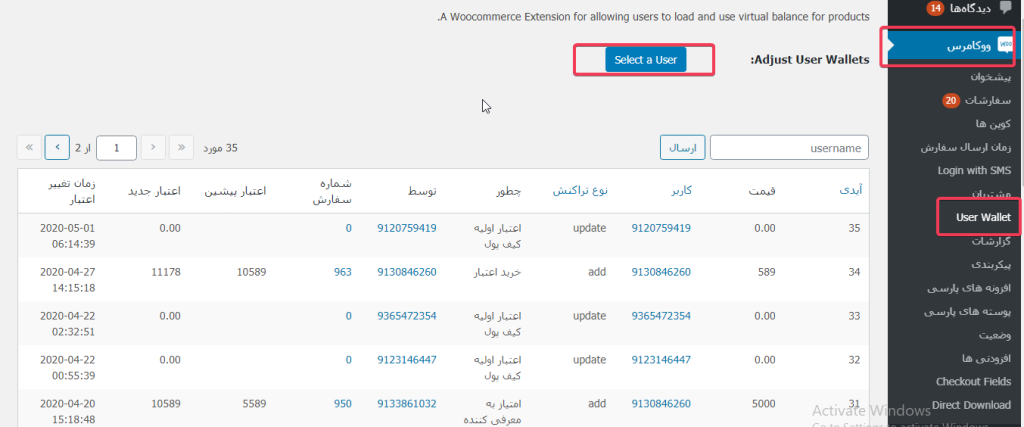
After pressing the select a user button, the following page will open and you can select the desired user from the list of users and then deduct or add an amount from the user.
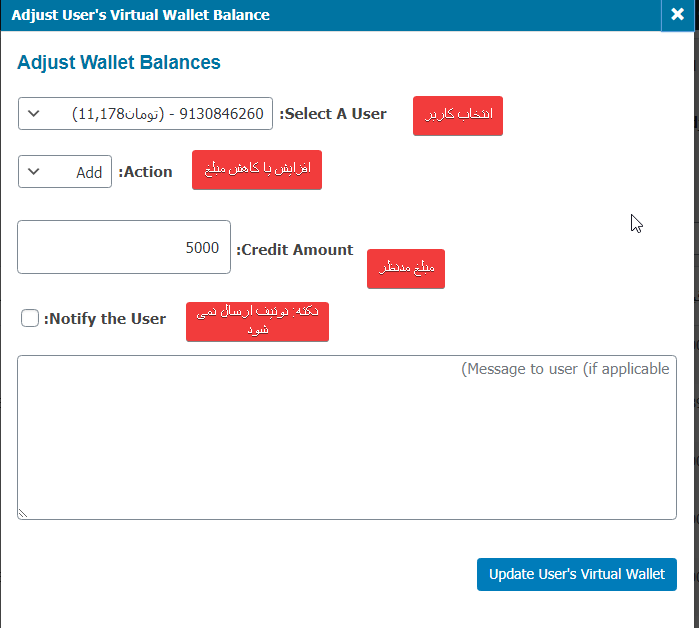
Note: In the Action section, there are the following three modes.
Add: Using this option, you can add credit to the user account. The amount of additional credit in the section (credit amount) Enter with final approval. This amount will be added to the user's initial credit. For example, if the user has a credit of 10 thousand tomans and you enter the amount of 2 thousand tomans, the new credit of the user will be 12 thousand tomans.
SubtractIf you want to reduce the user credit, select this option and enter the amount of the deficit in the field (credit amount) enter, after the final confirmation, the entered credit amount will be deducted from the user's initial credit.
Update: By selecting this option and entering the amount from the field (credit amount) , the user's credit will be exactly the amount you entered (regardless of the initial credit amount)
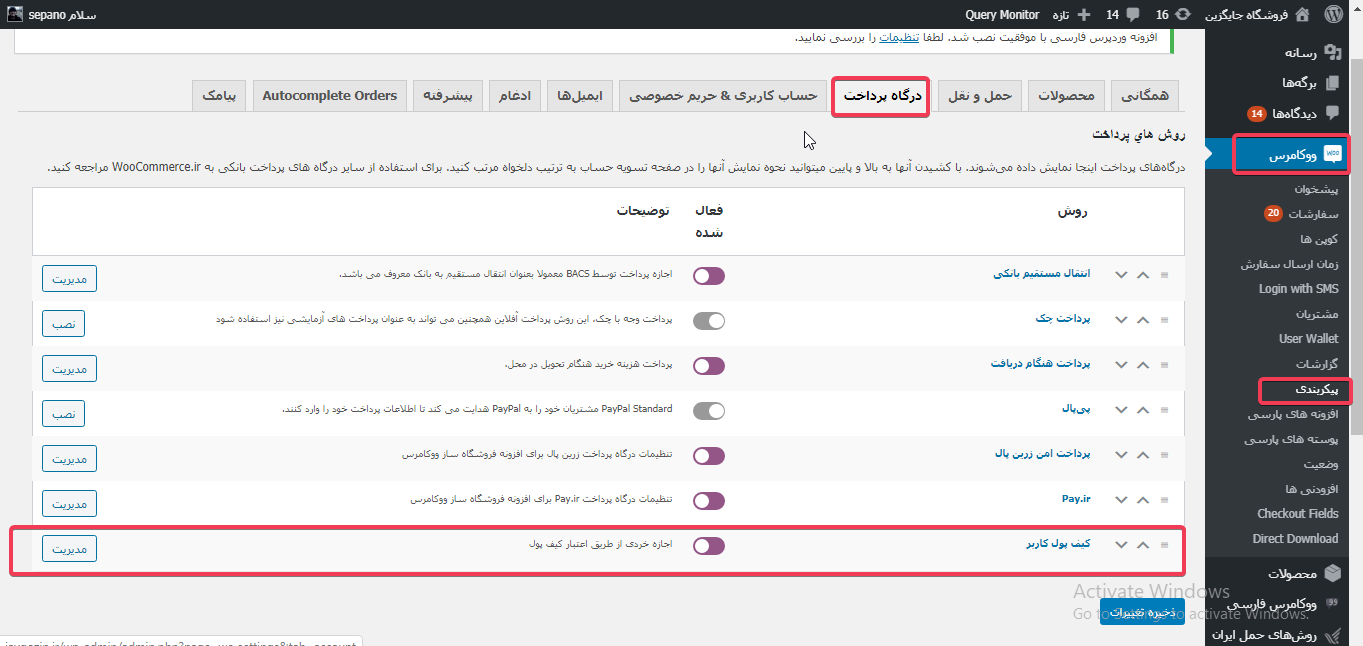
4- Activation of the wallet option in payment methods:
For this, just go to WooCommerce, configuration (settings), payment gateway section and set up and activate the wallet.
Display the status of wallet transactions:
Wallet transactions are available for the site admin in the WooCommerce user wallet section.
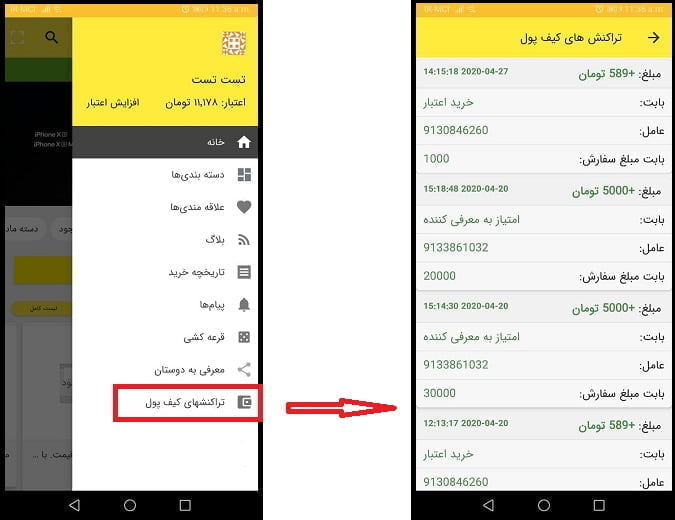
Wallet transactions are available for the user in the wallet transactions section of his user account.
Add a wallet on the website:
On any page where you want credits to be displayed for purchases on the site (for example, user account), it is enough to put the following code to display the total credits:
[uw_product_table]And if you want the amount of credit of each user to be displayed on the desired page (for example, user account). Enter the code below.
[uw_balance display_username=”true” separator=”:” username_type=”display_name”]


