
In normal mode, you can send notifications to your users. previously in Appchar notification guide, the items are fully explained to you. In addition to the normal notification of the application and Notification history, plugin Appchar advanced notification, helps you customize your app more.
How to activate and set the advanced notification function of Apchar:
Like other Apchar plugins, you must first purchase the license from the Apchar website. After buying a license, a license will be created on our site, inside your account, on the dashboard page, at the bottom of the page, and you must activate it on your site according to the image. After activation, without any settings, product and post notifications are linked to the desired product or post. be done).

After activating the advanced notification license, in the notification settings section, some new sections will be added, which you can see in the image below. (Note that the rest of the items were already there and only the numbered items were added).
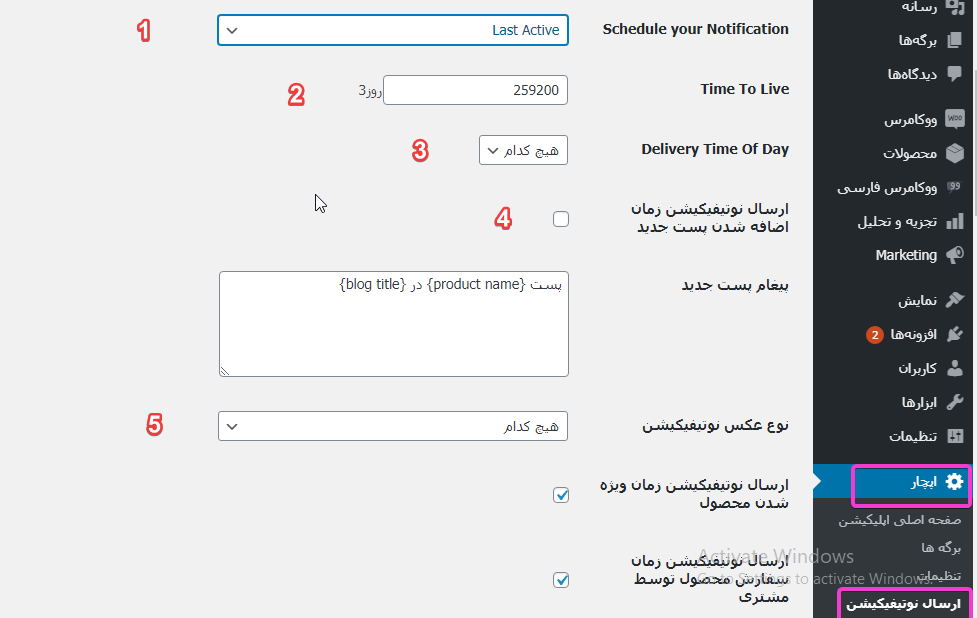
1- In this section, you can send a program. There are three modes based on settings.
A: None: The shipping status is normal. As soon as the notification is sent, it will be sent to all users at once.
B: time zone: it is done based on the time zone of sending. (This case is suitable for those who can sell in different countries)
A: last active: it is the best sending status. Based on how long each user has been online, it sends. In this way, the probability of receiving and paying attention to the notification is higher, and it also reduces the sending of notifications at once and the problems of sending at once.
2- Determines the life of the notifier. For example, if it is set to 3 days and the user does not go online, it will not be sent.
3- You can also set a time for receiving the notification. (24 hours a day)
Note: This is related to automatic sendings, not manual messages.
4- If you have a blog plugin, by ticking this box, a notification will be automatically sent to users as soon as a new article is created.
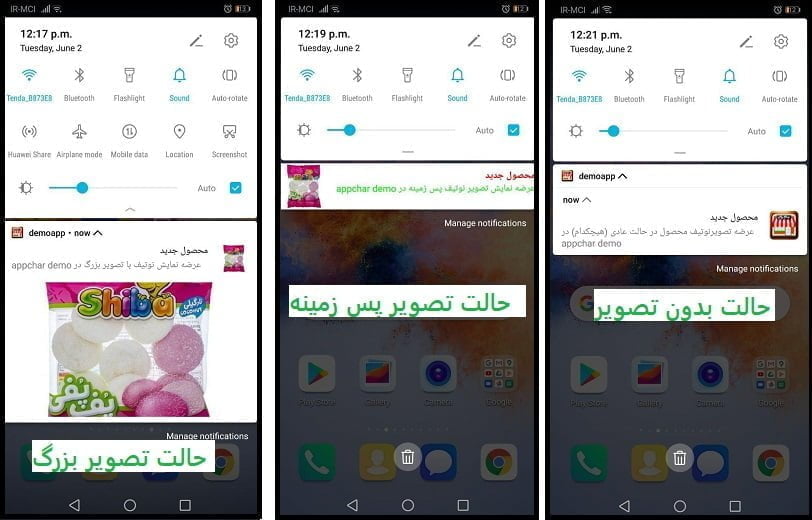
5- Notification photo: You can use three modes for the notification photo status in the advanced notification plugin.
A: None: In this case, the notification is sent normally and the program icon is sent next to the notification text.
B: Background: The photo of your product or article is placed in the background of its title.
A: Big picture: The photo of the post or product is placed below its title.
Note: In some Androids, the type of background display will be different from the image below.
Changes to manual notification settings:
As shown below, the numbered parts are added to the manual submission.
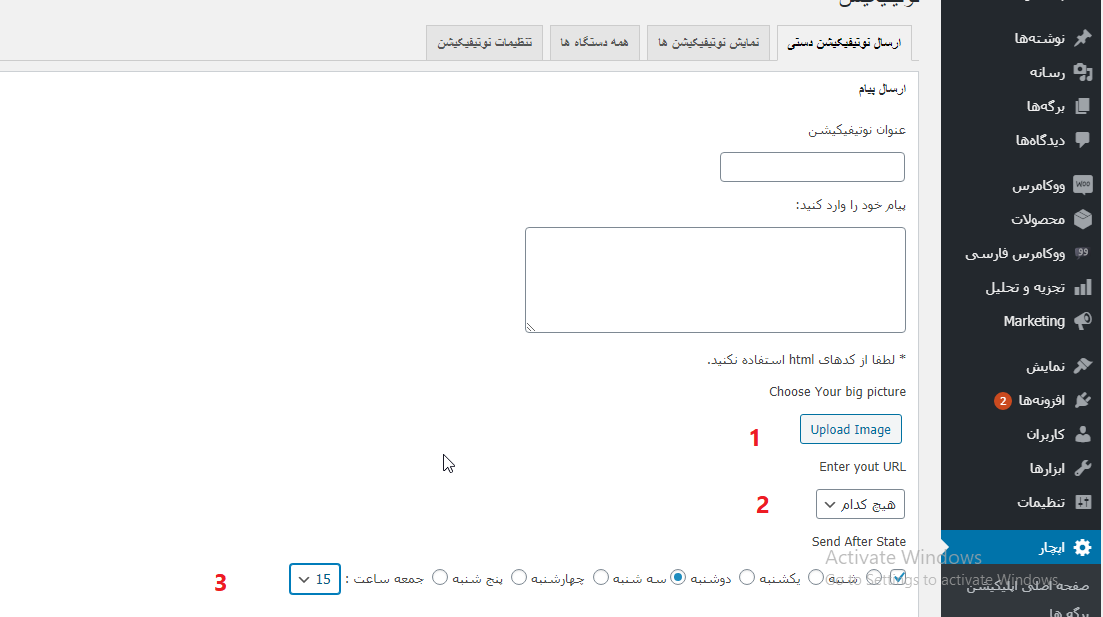
1- You can set a large image for notification.
2- You can link to Notif. Of course, the links are only added to the product and blog post. Note that you must put the ID of the product or post in the price settings.
Post ID: Refer to the article you want and edit it. Then identify the post id according to the image.

Product ID:

3- In manual sending, you can set the text to be sent later. For example, starting from Tuesday at 9 am.
Note: Pay attention to the settings and scheduling of sending in this regard.


